Dieffenbachia Care Guide: Complete Dumb Cane Instructions
Learn comprehensive Dieffenbachia care including light requirements, watering, humidity needs, and safety precautions for this popular Dumb Cane houseplant.
Quick Care Guide
Bright, indirect light
Water when top inch of soil is dry
40-50% humidity preferred
65-80°F (18-27°C)
Well-draining potting mix
Monthly during growing season
Keep away from cats, dogs, and children
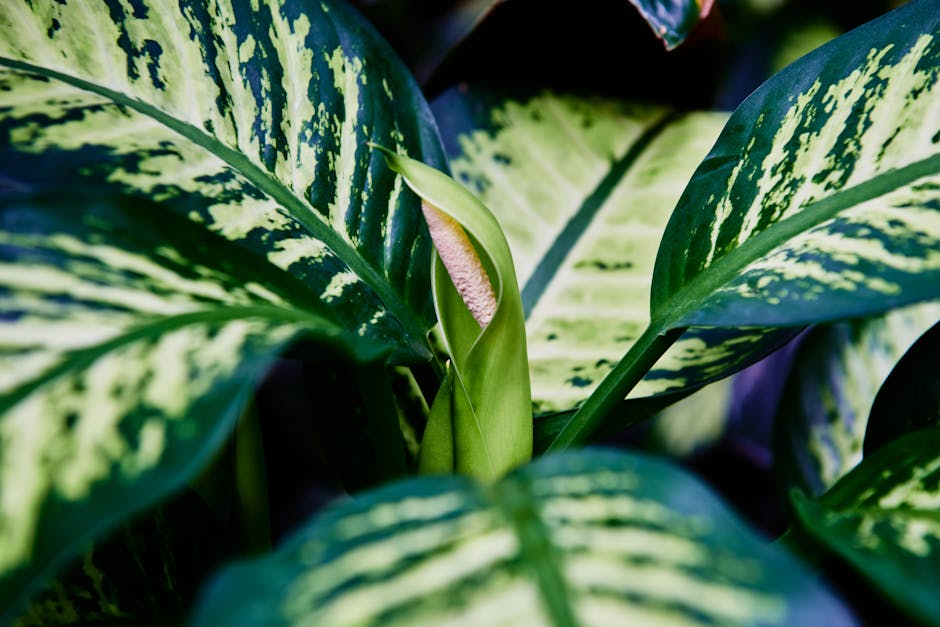
Dieffenbachia, commonly known as Dumb Cane, is a beloved houseplant that brings a touch of the tropics into our homes. With its lush, variegated foliage and striking presence, it has become a staple for both novice and experienced plant enthusiasts alike. Not only does this plant serve as an eye-catching decor piece, but it also purifies the air, making it a functional addition to any living space. This guide aims to provide you with everything you need to know about caring for your Dieffenbachia, ensuring it thrives in your home environment.
While Dieffenbachia is often praised for its ease of care, it does have specific needs that must be met to keep it looking its best. From understanding its light requirements to knowing how often to water, every aspect of its care plays a role in its overall health. Additionally, as you delve into the world of Dieffenbachia, you will discover fascinating insights about its characteristics and why it has earned the nickname “Dumb Cane.” This guide will equip you with comprehensive knowledge to cultivate a thriving Dumb Cane, transforming your living space into a tropical sanctuary.
Getting to Know Your Plant
Dieffenbachia is a genus of tropical flowering plants that belong to the family Araceae. Known for its broad, lush leaves adorned with striking patterns of green and white, this plant can grow to impressive heights, often reaching up to six feet in optimal conditions. The aesthetic appeal of Dieffenbachia is complemented by its adaptability, making it suitable for various indoor environments. Despite its beautiful appearance, it is essential to handle this plant with care due to its toxic sap, which can cause discomfort if ingested. This aspect of Dieffenbachia is crucial to remember, especially for households with pets and young children.
The origin of Dieffenbachia can be traced back to the tropical rainforests of Central and South America, where it thrives in humid, shaded conditions. Its lush foliage not only attracts the eye but also serves a practical purpose in its native habitat, as it assists in filtering out harmful toxins from the air. This remarkable ability to purify the air has contributed to its popularity as a houseplant. Understanding the natural environment of Dieffenbachia allows us to replicate its preferred conditions within our homes, ultimately leading to a healthier and more vibrant plant.
Light Requirements
When it comes to light, Dieffenbachia has specific preferences that are crucial for its growth and overall well-being. It thrives in bright, indirect light, making it an ideal candidate for placement near east or north-facing windows where it can soak up the sun’s rays without experiencing the harshness of direct sunlight. While Dieffenbachia can tolerate medium light conditions, it is essential to avoid exposing it to direct sunlight, as this can scorch the vibrant leaves and lead to unsightly brown edges.
If your Dieffenbachia is not receiving enough light, you may notice that its growth slows down, and the leaves may become sparse. Conversely, too much direct sunlight can cause the leaves to lose their striking variegation and develop yellow patches. The key to a thriving Dieffenbachia lies in striking the perfect balance of light. If you find that your plant is leaning towards the light source, it may be an indication that it needs to be rotated or repositioned to ensure even growth.
Watering Guidelines
Watering is one of the most critical aspects of Dieffenbachia care, and getting it just right can make all the difference. This plant prefers to be watered when the top inch of soil feels dry to the touch, typically every seven to ten days. It thrives in consistently moist soil, but it is essential to avoid overwatering, which can lead to root rot—a common issue for indoor plants. To determine the optimal watering schedule, consider factors such as humidity levels, temperature, and the size of the pot.
When watering your Dieffenbachia, it is advisable to use room temperature water and ensure that excess water drains out of the pot. This practice prevents the roots from sitting in water, which can create an environment conducive to fungal growth. Additionally, during the winter months, when the plant enters a period of slower growth, you may find that it requires less frequent watering. Observing your plant’s soil moisture and adjusting your watering routine accordingly will help maintain its health and vitality.
Soil and Potting Requirements
The foundation of a healthy Dieffenbachia lies in choosing the right soil and potting conditions. A well-draining potting mix is essential for this plant, as it helps prevent excess moisture from accumulating around the roots. A blend that includes peat moss, perlite, and orchid bark is ideal, as it provides the necessary aeration while retaining adequate moisture. When potting your Dieffenbachia, ensure that the container has drainage holes to facilitate proper water management.
Repotting your Dieffenbachia should be done every couple of years or when you notice that the roots are becoming root-bound. When repotting, choose a pot that is one size larger than the current one to provide ample space for growth. This practice not only refreshes the soil but also allows the plant to establish a more robust root system, promoting overall health and vigor. When selecting a new pot, consider using one that complements the aesthetic of your plant while also providing the necessary functionality for optimal growth.
Temperature and Humidity
Dieffenbachia is a tropical plant that thrives in warm and humid conditions, making it well-suited for indoor environments that mimic its native habitat. The ideal temperature range for Dieffenbachia is between 65°F and 80°F (18°C to 27°C). Exposure to temperatures outside this range, particularly cold drafts or sudden temperature fluctuations, can stress the plant and lead to issues such as yellowing leaves or stunted growth.
Humidity is another critical factor in Dieffenbachia care. This plant prefers humidity levels between 40% and 50%, which can be easily achieved in most homes. However, during winter months when indoor heating can dry out the air, you may need to take additional steps to increase humidity. This can be done by placing a humidifier nearby, grouping your plants together to create a microclimate, or using a pebble tray filled with water beneath the pot. By providing adequate humidity, your Dieffenbachia will flourish, showcasing its vibrant foliage and robust growth.
Fertilizing Schedule
To keep your Dieffenbachia thriving, a consistent fertilizing schedule during the growing season is essential. This typically occurs from spring to early fall when the plant is actively growing. Monthly applications of a balanced, water-soluble fertilizer will provide the necessary nutrients to support healthy growth and vibrant foliage. When applying fertilizer, be sure to dilute it according to package instructions, as over-fertilization can lead to salt buildup in the soil and negatively impact the plant.
In the fall and winter months, when growth slows down, you can reduce or even eliminate fertilization. This pause allows the plant to rest and conserve energy for the upcoming growing season. Observing your Dieffenbachia’s growth patterns and adjusting your fertilization routine accordingly will ensure that it remains healthy and lush throughout the year.
Propagation Methods
If you find yourself enamored with your Dieffenbachia and wish to expand your collection, propagation is a rewarding endeavor. The most common method for propagating Dieffenbachia is through stem cuttings. To do this, select a healthy stem with several leaves and cut it just below a node. Allow the cutting to dry for a day or two to prevent rot, then place it in a glass of water or directly into a pot with moist potting mix.
When propagating in water, be sure to change the water every few days to keep it fresh and oxygenated. After a few weeks, you should begin to see roots developing. Once the roots are a few inches long, you can transplant the cutting into soil. If you choose to propagate directly in soil, keep the soil consistently moist while the cutting establishes itself. With a little patience and care, you’ll soon have new Dieffenbachia plants to enjoy or share with friends.
Common Problems and Solutions
As with any houseplant, Dieffenbachia may encounter its fair share of challenges. One common issue is yellowing leaves, which can result from overwatering, underwatering, or even natural aging. If you notice yellow leaves, take a moment to assess the soil moisture. Ensure that the plant is not sitting in overly wet soil, and if it is, allow it to dry out before the next watering. If the soil feels dry, give your plant a thorough watering to rehydrate it.
Pests can also pose a challenge for Dieffenbachia. Common pests include spider mites, aphids, and mealybugs. Regularly inspecting your plant for signs of infestation, such as webbing or sticky residue, will help you catch any issues early. If you do discover pests, treating your plant with insecticidal soap or neem oil can be effective. It’s essential to follow the product instructions carefully and consider isolating the affected plant until the issue is resolved.
Seasonal Care Adjustments
As the seasons change, so too do the care requirements for your Dieffenbachia. During the warmer months, you may find that your plant thrives in brighter light and requires more frequent watering. This is the perfect time to assess its growth and make any necessary adjustments to its environment. On the other hand, as temperatures drop in the fall and winter, you may notice a slowdown in growth. Adjust your watering and fertilization routines accordingly, and be mindful of any cold drafts that may affect your plant’s health.
Additionally, as daylight hours decrease, consider rotating your plant to ensure it receives even light exposure. This simple adjustment can help prevent one-sided growth and promote a more balanced, bushy appearance. By tuning into the seasonal changes and adapting your care routine, you can keep your Dieffenbachia healthy and thriving all year round.
In conclusion, Dieffenbachia is a stunning and easy-care houseplant that can bring life and color to your home. By understanding its specific needs and providing the right conditions, you can enjoy the beauty of this tropical plant for years to come. Remember to handle it with care, particularly if you have pets or small children, and take the time to observe its growth and adjust your care routine as needed. With a little attention and love, your Dieffenbachia will reward you with lush foliage and a vibrant presence in your space.
Safety Note: Dieffenbachia contains compounds that are toxic to cats, dogs, and humans if ingested. Keep plants out of reach of curious pets and small children. Contact a veterinarian or poison control center if ingestion occurs.
Frequently Asked Questions
How much light does Dieffenbachia need? ▼
Dieffenbachia prefers bright, indirect light. It can tolerate medium light but avoid direct sunlight which can scorch the variegated leaves.
How often should I water my Dieffenbachia? ▼
Water when the top inch of soil feels dry, typically every 7-10 days. Keep soil consistently moist but not waterlogged.
Why is Dieffenbachia called Dumb Cane? ▼
The common name comes from the plant's toxic sap, which can cause temporary speechlessness if ingested. Handle with care and keep away from pets and children.
Is Dieffenbachia safe for pets? ▼
No, Dieffenbachia is highly toxic to cats and dogs. The sap contains calcium oxalate crystals that can cause severe mouth and throat irritation.
Why are my Dieffenbachia leaves turning yellow? ▼
Yellow leaves usually indicate overwatering, underwatering, or natural aging. Check soil moisture and drainage, and remove naturally aging lower leaves.
Explore Related Topics
Was this guide helpful?
Your input helps us improve our guides.
How can we improve this guide?
Similar Plants You Might Like

Aglaonema Silver Bay Care Guide: Complete Instructions for Chinese Evergreen Beauty
Learn how to care for Aglaonema Silver Bay with our comprehensive guide covering light, watering, humidity, and maintaining stunning silver variegation in this easy-care houseplant.
Easy
Alocasia Elephant Ear Care Guide: Complete Growing Instructions for Tropical Beauty
Learn how to care for Alocasia Elephant Ear plants with our comprehensive guide covering humidity, watering, light requirements, and troubleshooting for stunning tropical growth.
Moderate
Aloe Vera Care Guide: Complete Instructions for Aloe Barbadensis Miller
Learn how to care for Aloe Vera plants with our comprehensive guide covering light, watering, harvesting gel, and propagating pups for healthy growth.
Easy