Monstera Deliciosa Care Guide: Complete Instructions for Swiss Cheese Plant
Learn how to care for Monstera Deliciosa with our comprehensive guide covering light, watering, support, and encouraging fenestration development indoors.
Quick Care Guide
Bright, indirect light
When top 1-2 inches of soil dry (every 1-2 weeks)
50-70% preferred
65-85°F (18-29°C)
Well-draining, chunky potting mix
Keep away from cats, dogs, and children
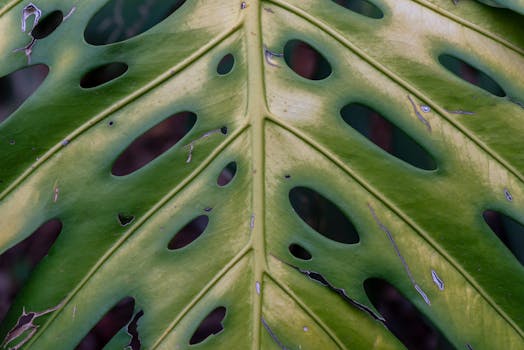
Monstera Deliciosa, affectionately known as the Swiss Cheese Plant, has captured the hearts of houseplant aficionados and interior decorators alike. Its striking, iconic foliage, characterized by large leaves adorned with unique holes and splits, brings a touch of tropical elegance to any indoor space. However, cultivating a thriving Monstera requires more than just placing it in a sunny corner. This comprehensive care guide will walk you through all the essentials you need to know to ensure your Monstera Deliciosa flourishes in your home, from its light and watering needs to its ideal soil conditions and fertilization schedule.
As you embark on your journey with this stunning plant, it’s important to understand not only what it needs but also how to create an environment that encourages its natural growth patterns. Monsteras are native to the tropical rainforests of Central America, where they climb trees and bask in dappled sunlight. Mimicking these conditions indoors will help your Monstera thrive, encourage fenestration, and develop into the magnificent specimen you envision.
Let’s delve deeper into the world of Monstera Deliciosa, exploring its care requirements and how to create the perfect habitat for this climbing beauty.
Getting to Know Your Plant
Understanding the characteristics of Monstera Deliciosa is the first step in providing it with the care it needs. This tropical vine can grow quite large, reaching heights of up to 10 feet or more in its natural habitat. In a home setting, it can still reach impressive heights, especially when given the right support. The leaves of the Monstera are one of its most defining features; they can grow up to three feet long and develop those signature holes, known as fenestrations, as the plant matures.
While young Monsteras may present solid leaves, they start to develop their distinctive perforations after a couple of years, particularly when they receive ample light and proper support. This evolution is not just for aesthetics; the holes and splits are believed to allow wind to pass through, which helps the plant survive in its native habitat. Understanding this growth pattern will help you appreciate the beauty of your Monstera as it matures and develops its unique character.
Light Requirements
Light is a crucial factor in the overall health of your Monstera Deliciosa. In its natural environment, this plant thrives in bright, indirect light, typically filtered through the canopy of taller trees. To mimic this condition indoors, place your Monstera near a window that receives plenty of filtered sunlight. Avoid direct sunlight, which can scorch the leaves, leading to brown patches and a stressed plant.
If you notice that your Monstera’s growth has slowed or the leaves are turning yellow, it may be a sign that it isn’t receiving enough light. Conversely, if you observe browning leaf tips, it could indicate that the plant is receiving too much direct sun. The ideal compromise is a bright spot where the light is intense but indirect, such as a few feet away from a south or west-facing window. If the natural light in your home is limited, consider using grow lights to supplement the light requirements, ensuring your Monstera remains vibrant and healthy.
Watering Guidelines
Watering your Monstera Deliciosa correctly is essential for its overall health and growth. This plant prefers a consistent watering schedule, which requires you to pay attention to the moisture levels in the soil. A good rule of thumb is to water your Monstera when the top 1 to 2 inches of soil feel dry. This typically translates to watering every one to two weeks, although the frequency may vary depending on factors like temperature, humidity, and pot size.
To water your Monstera effectively, ensure you provide a thorough soaking until water drains out of the bottom of the pot. This deep watering encourages the roots to grow downwards, creating a more stable and robust plant. However, be cautious not to let your Monstera sit in standing water, as this can lead to root rot, a common issue for indoor plants. If you find that your plant is drying out too quickly or remaining too soggy, consider adjusting the pot size or the type of potting mix you are using.
Soil and Potting Requirements
Choosing the right soil for your Monstera Deliciosa is vital for its health and growth. This plant thrives in well-draining, chunky potting mixes that allow for proper aeration and moisture retention. A blend of potting soil, perlite, and orchid bark is an excellent choice, as it offers the drainage needed to prevent waterlogging while still holding enough moisture for the roots.
When potting your Monstera, select a pot with drainage holes to facilitate excess water escape. As your Monstera grows, it may become root-bound in its pot, which can hinder its growth and overall health. If you notice roots emerging from the drainage holes or circling the surface of the soil, it may be time to repot your plant into a larger container. Ideally, repotting should be done every couple of years in the spring, coinciding with the plant’s active growing season. This will provide fresh nutrients and space for the roots to expand.
Temperature and Humidity
Monstera Deliciosa thrives in warm, humid environments, making it important to replicate these conditions as closely as possible indoors. The ideal temperature range for your plant is between 65°F and 85°F (18°C to 29°C). It’s crucial to keep your Monstera away from cold drafts, air conditioning vents, or sudden temperature fluctuations, as these can stress the plant and impede its growth.
Humidity is another critical factor for the Monstera’s well-being. Ideally, this plant prefers humidity levels between 50% and 70%. If your home tends to be dry, especially during winter months, consider using a humidifier to maintain an appropriate moisture level in the air. Alternatively, grouping your Monstera with other plants can create a microclimate that increases humidity. Regular misting can also help, but be cautious not to overdo it, as this can lead to fungal issues.
Fertilizing Schedule
Fertilizing your Monstera Deliciosa is a practice that can significantly enhance its growth and vitality. During the growing season, which typically spans from spring to summer, a balanced, water-soluble fertilizer can be applied every 4 to 6 weeks. This provides the necessary nutrients for your plant to thrive and encourages the development of those iconic fenestrated leaves.
When choosing a fertilizer, look for one that is specifically formulated for houseplants, with a balanced ratio of nitrogen, phosphorus, and potassium. Avoid fertilizing during the fall and winter months when the plant is dormant, as this can lead to nutrient buildup in the soil and potential harm to the roots. If you notice yellowing leaves or stunted growth, it might be a sign that your Monstera needs more nutrients. In contrast, if your plant is developing brown leaf tips, it could indicate over-fertilization, and it may be wise to flush the soil with water to remove excess salts.
Propagation Methods
If you’re captivated by the beauty of Monstera Deliciosa and wish to expand your collection, propagation is a rewarding endeavor. This plant can be propagated quite easily through stem cuttings. To do this, select a healthy stem that has at least one node and one leaf. Cut just below the node with a clean, sharp knife or scissors.
You can choose to propagate your cutting in water or directly in soil. If opting for water propagation, place the cutting in a jar of water, ensuring the node is submerged while the leaf remains above the waterline. Change the water weekly to prevent stagnation. Roots will begin to develop within a few weeks. If you prefer soil propagation, plant the cutting directly into your well-draining potting mix, keeping the soil moist but not soggy. In both methods, be patient; it can take several weeks for roots to develop. Once established, you can pot your new Monstera as you would any mature plant.
Common Problems and Solutions
Despite your best efforts, you may encounter some common issues when caring for your Monstera Deliciosa. One of the most frequent problems is yellowing leaves, which can occur for several reasons, including overwatering, underwatering, or inadequate light. To address this, assess your watering routine and ensure your plant is receiving the right amount of light. If the yellowing persists, inspect for pests, as infestations can also cause distress.
Another common concern is the absence of fenestration in younger plants. As mentioned earlier, young Monsteras typically produce solid leaves, and fenestration usually develops as the plant matures, typically around two to three years old. To encourage this process, ensure your Monstera receives bright, indirect light and provide support for it to climb naturally.
Pests like spider mites, mealybugs, and scale can occasionally invade your Monstera. If you notice tiny webs or sticky residue on the leaves, inspect the plant closely. Treat infestations promptly with insecticidal soap or neem oil, ensuring that you follow the instructions carefully. Regularly cleaning the leaves with a damp cloth can also help prevent pest build-up and keep your plant healthy.
Seasonal Care Adjustments
As the seasons change, so too should your care routine for your Monstera Deliciosa. During the spring and summer, when the plant is actively growing, it will require more frequent watering and fertilization. Monitor the moisture levels in the soil closely during these months, as the increased light and warmth can lead to quicker drying.
As autumn arrives and temperatures drop, you may notice that your plant’s growth slows down. This is a natural response, and you should adjust your watering and fertilizing schedule accordingly. Reduce fertilization during the fall and winter months and cut back on watering, allowing the soil to dry out slightly between waterings.
Additionally, pay attention to the humidity levels in your home during the winter months. Heating systems can significantly lower humidity, so consider using a humidifier or placing a pebble tray filled with water near your plant to maintain an environment that supports its tropical nature.
In conclusion, caring for a Monstera Deliciosa requires a blend of knowledge, patience, and attentiveness. By understanding its natural habitat and replicating those conditions indoors, you can enjoy the beauty of this iconic plant for years to come. With the right light, water, soil, and attention to seasonal changes, your Monstera will flourish and reward you with its stunning foliage and unique character.
Safety Note: Monstera Deliciosa contains compounds that are toxic to cats, dogs, and humans if ingested. Keep plants out of reach of curious pets and small children. Contact a veterinarian or poison control center if ingestion occurs.
Frequently Asked Questions
How do I get my Monstera to develop holes (fenestration)? ▼
Provide bright, indirect light, proper support for climbing, and allow the plant to mature. Fenestration typically appears on plants that are 2-3 years old in optimal conditions.
How often should I water my Monstera Deliciosa? ▼
Water when the top 1-2 inches of soil feel dry, typically every 1-2 weeks. Monsteras prefer consistent moisture but not waterlogged conditions.
Does my Monstera need a moss pole? ▼
While not required, moss poles help Monsteras climb naturally, leading to larger leaves and better fenestration. They're especially beneficial for mature plants.
Why doesn't my Monstera have holes in the leaves? ▼
Young Monsteras produce solid leaves. Holes develop as the plant matures (2+ years) and receives adequate light and proper climbing support.
Are Monstera Deliciosa safe for pets? ▼
No, Monsteras are toxic to cats and dogs due to calcium oxalate crystals. Keep them out of reach of pets and children.
Explore Related Topics
Was this guide helpful?
Your input helps us improve our guides.
How can we improve this guide?
Similar Plants You Might Like
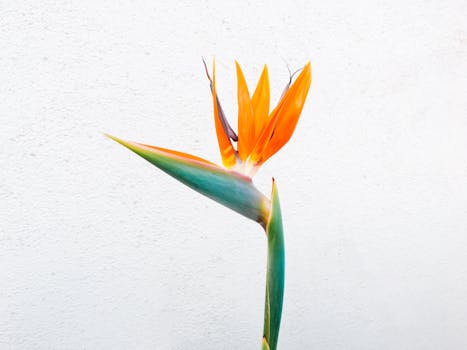
Bird of Paradise Care Guide: Complete Growing Instructions for Strelitzia
Learn how to care for Bird of Paradise (Strelitzia) with our comprehensive guide covering light, watering, humidity, pruning, and troubleshooting for stunning tropical growth.
Moderate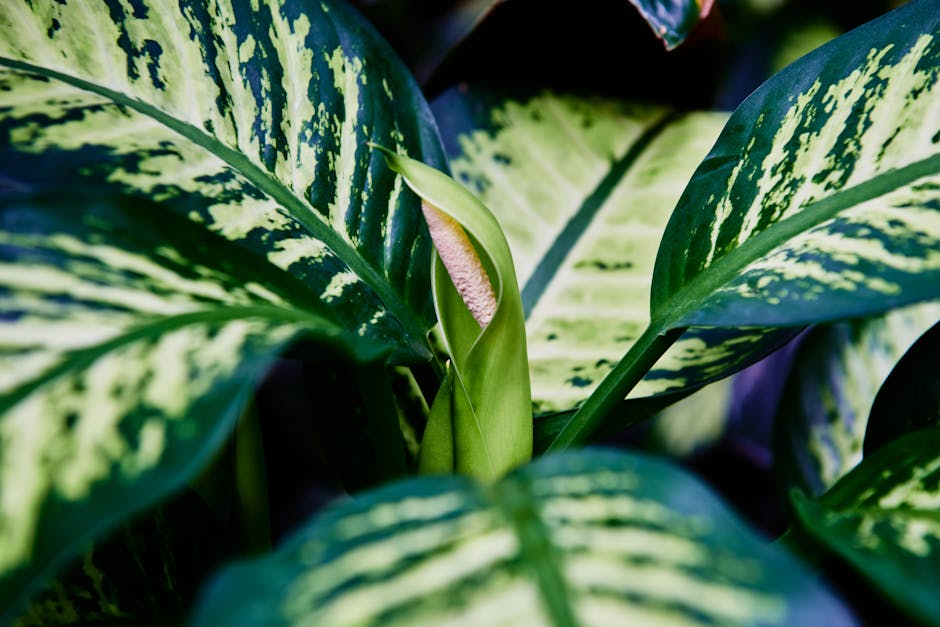
Dieffenbachia Care Guide: Complete Dumb Cane Instructions
Learn comprehensive Dieffenbachia care including light requirements, watering, humidity needs, and safety precautions for this popular Dumb Cane houseplant.
Easy
English Ivy Care Guide: Complete Instructions for Hedera Helix
Learn how to care for English Ivy with our comprehensive guide covering light, watering, propagation, and maintaining healthy trailing growth indoors.
Easy