Plant Propagation Guide: How to Multiply Your Houseplants
Learn various propagation methods including water propagation, soil propagation, division, and air layering to create new plants from your existing collection.
Plant propagation is a delightful and rewarding aspect of gardening that allows you to multiply your beloved houseplants with minimal investment. Whether you are an avid plant enthusiast or a novice just starting to explore the world of greenery, understanding the various methods of propagation can transform your collection from a few plants to a lush indoor garden. This guide will take you through the most popular propagation techniques, such as water propagation, soil propagation, division, and air layering. By the end of this article, you’ll be equipped with the knowledge to create new plants from your existing collection, ensuring your green thumb continues to flourish.
In the realm of houseplants, propagation serves not only as a way to expand your botanical family but also as an opportunity to share the joy of gardening with friends and family. Each method presents its unique charm, allowing you to witness the miraculous transformation of a simple cutting into a fully-fledged plant. As we embark on this journey through the propagation process, you’ll discover the ideal conditions for success, the best times to propagate, and techniques that suit your lifestyle.
So, whether you’re looking to fill your home with more greenery, share plants with loved ones, or simply engage in a fulfilling hobby, let’s dive into the art of plant propagation.
Understanding the Problem
At its core, plant propagation is all about creating new plants from existing ones. This process can seem daunting at first, but it is fundamentally about understanding the natural growth patterns and life cycles of plants. Each method of propagation hinges on the plant’s ability to regenerate from cuttings or divisions, which can be nurtured into healthy, thriving specimens.
When considering propagation, it’s essential to recognize that not all plants respond equally to every method. Some may thrive with a simple water propagation technique, while others may require a more nuanced approach, such as air layering. Understanding the various methods and the specific needs of your plants will be crucial as you embark on your propagation journey.
Moreover, you might find yourself asking questions about the timing of propagation and the best practices to ensure success. For instance, spring and early summer are considered the optimal periods for propagation since plants are actively growing. During these times, they are more likely to root successfully and develop into robust new specimens. In contrast, attempting to propagate during the winter, when many plants enter a state of dormancy, can lead to disappointing results.
Identifying the Signs
Before you delve into the actual propagation process, it is vital to identify the right plants and cuttings for reproduction. Look for healthy, vibrant plants that display signs of vigorous growth. Leaves should be lush and green, and the stems should be sturdy, showing no signs of disease or distress. The best candidates for propagation are often those that have outgrown their pots or have begun to stretch toward the light.
When selecting cuttings for propagation, focus on stems that have nodes, which are the small bumps from which leaves and roots emerge. These nodes are crucial for successful rooting, as they serve as the birthplaces of new growth. For beginners, popular houseplants such as pothos, spider plants, snake plants, ZZ plants, and rubber plants are excellent choices due to their high success rates in propagation.
It’s also essential to consider the health of your existing plants. If your plants are struggling with pests or disease, it may not be the best time to propagate. In such cases, addressing the underlying issues should take priority to ensure that any new cuttings you take are healthy and viable.
Common Causes
As you embark on your propagation adventure, understanding some common pitfalls can help you navigate the process more effectively. One of the most frequent challenges beginners face is failure to provide adequate conditions for rooting. Factors such as insufficient light, improper watering, and unsuitable temperatures can hinder the success of your cuttings.
When propagating in water, ensure that the cuttings receive indirect sunlight, as direct sunlight can cause the water to heat up too much, leading to rotting. Similarly, if you choose soil propagation, be mindful of the type of soil you use; a well-draining mix is critical to prevent waterlogging, which can suffocate the roots and lead to decay.
Another common mistake is neglecting to monitor the moisture levels. While it may be tempting to keep the cuttings in a humid environment, too much moisture can create conditions conducive to fungal growth. Striking the right balance is key, and many propagation enthusiasts find that misting the cuttings or placing a plastic bag over them can help retain moisture without creating a swampy environment.
Lastly, while rooting hormone can be beneficial in speeding up the rooting process, it is not always necessary for easy-to-propagate plants. Many beginners may feel overwhelmed by the idea of needing additional materials, but rest assured that with the right conditions, many plants will root successfully without the use of rooting hormones.
How to Fix It
Now that you have a solid understanding of propagation and the common pitfalls, it’s time to dive into the practical side of things. Each propagation method has its unique steps, and mastering these will greatly enhance your success rate.
Starting with water propagation, this method is often regarded as the easiest for beginners. Simply take a healthy cutting, ensuring it has a few nodes, and place it in a glass of water. It’s best to use clear containers so you can monitor the development of roots. Change the water regularly to keep it fresh and prevent bacterial growth. In about two to six weeks, depending on the species and environmental conditions, you should see roots emerging from the nodes, at which point you can transfer the cutting to soil.
Soil propagation is another effective method that allows cuttings to root directly in potting mix. For this technique, prepare a small pot with a well-draining soil mix. Make a hole in the soil using your finger or a stick and insert the cutting, ensuring that at least one node is buried. Water the cutting lightly and place it in a warm area with indirect sunlight. Keep the soil consistently moist but not soggy, and in a few weeks, you should notice new growth, signaling that roots are developing.
For those with more experience or a bit more patience, division and air layering are excellent techniques. Division involves carefully separating a plant into multiple sections, each with roots and foliage. This method is particularly effective for clumping plants like snake plants and spider plants. Make sure to use clean, sharp tools to minimize damage, and replant each division into fresh soil.
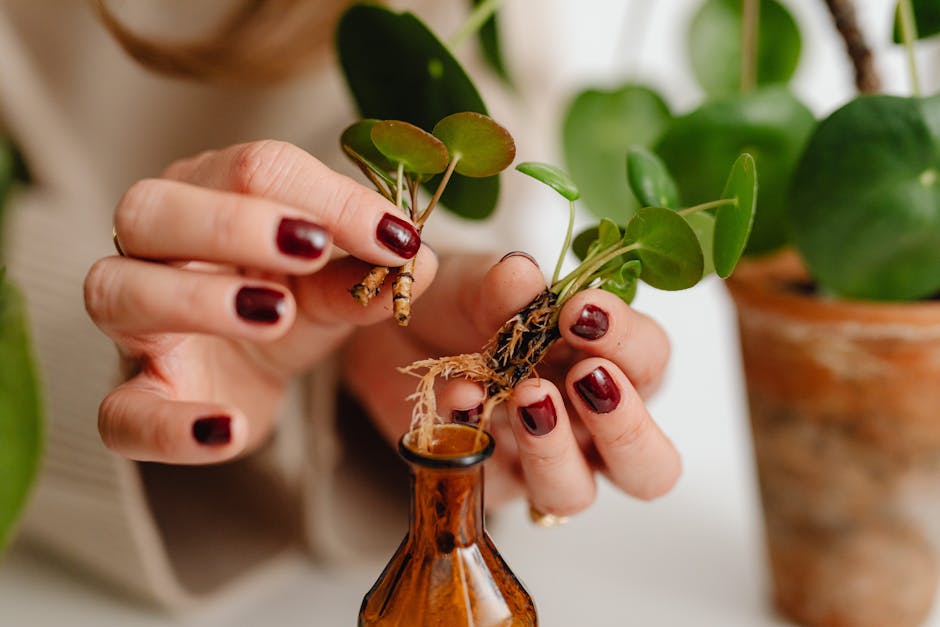
Air layering is a more advanced technique but can yield impressive results, especially for larger plants that are not easily propagated through cuttings. This method involves making a small incision in the stem of the plant, wrapping it with moist sphagnum moss, and covering it with plastic to create a humid environment. After a few weeks, roots will begin to form, and you can cut the new plant from the parent and pot it up.
Prevention Tips
Preventing common propagation issues is essential for long-term success. To ensure that your cuttings thrive, pay close attention to their environment. Maintain consistent temperatures in the range of 65 to 75 degrees Fahrenheit, as fluctuations can stress the plants and hinder their growth.
Providing adequate light is also crucial. While most cuttings prefer indirect sunlight, it’s important to remember that each species has its unique light requirements. Research your specific plants to understand their needs and ensure they are receiving the right amount of light without being scorched.
Additionally, maintaining proper moisture levels is paramount. Depending on the method you choose, whether water or soil, strive to keep the environment consistently damp but not overly wet. Regularly checking on your cuttings will help you gauge their moisture needs and make adjustments accordingly.
Fertilizing can also play a role in promoting healthy growth. Once your cuttings have rooted and are ready for transplanting, introducing a diluted liquid fertilizer can provide the necessary nutrients for robust development. However, be cautious during the initial rooting phase; too much fertilizer can hinder root growth.
Lastly, it’s beneficial to keep a propagation journal. Documenting your successes and failures will help you refine your techniques over time and provide insights into what works best for your specific plants.
When to Get Help
While propagation can be a fulfilling and enjoyable process, there may be times when you encounter challenges that seem insurmountable. If you find that your cuttings are consistently failing to root or are showing signs of distress, consider seeking help from a local gardening club, nursery, or online community. These resources can provide valuable insights and support to help you troubleshoot issues.
If pests or diseases are affecting your plants, it may be wise to consult a professional. Identifying the specific problem can be crucial for the health of both your existing plants and any new cuttings you attempt to propagate.
Ultimately, remember that gardening is a journey filled with learning experiences. Each propagation attempt, whether successful or not, contributes to your growth as a gardener. Celebrate your successes, learn from your failures, and continue to nurture your love for plants. With patience and practice, you’ll soon find yourself surrounded by an abundance of thriving houseplants, a testament to your dedication and passion for propagation.
Safety Note: Always research the toxicity of plants before bringing them into homes with pets or small children.
Frequently Asked Questions
What's the easiest plant propagation method for beginners? ▼
Water propagation is the easiest method for beginners. Simply cut a stem with nodes and place in water until roots develop, then plant in soil.
When is the best time to propagate plants? ▼
Spring and early summer are ideal for propagation when plants are actively growing. Avoid propagating during winter dormancy periods.
How long does it take for cuttings to root? ▼
Most cuttings develop roots in 2-6 weeks depending on the plant species, method used, and environmental conditions.
Which plants are easiest to propagate? ▼
Pothos, spider plants, snake plants, ZZ plants, and rubber plants are among the easiest to propagate and have high success rates.
Do I need rooting hormone for propagation? ▼
Rooting hormone helps speed up the process and increases success rates, but it's not required for most easy-to-propagate houseplants.